Import Request Routing
The Import Request Routing screen allows you to create an import request routing. An import request routing allows you to create a template of all necessary properties to automatically create a unique, configured import request document when a file is placed in one of the defined locations (folders). From this screen, you can map one or more routing file locations. When documents are added to the routing file location, a file watcher will create or update documents and submit them into the defined BST11 workflow.
|
|
Warning: An auto counter must be enabled for Import Request Routing. This automatically creates a Document Number. |
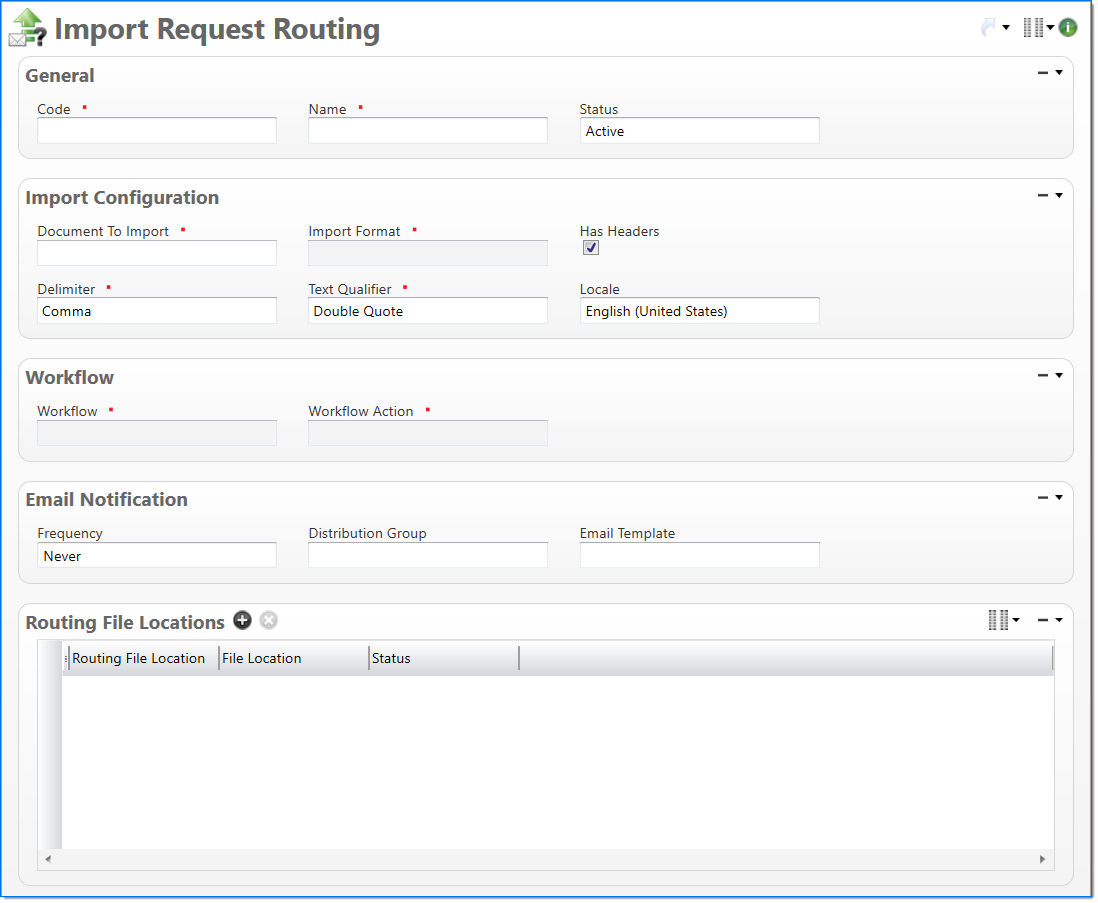
General
In the General area, enter basic information about the import request routing.
| Field | Description | |
|---|---|---|

|
Code | Enter a unique alphanumeric key to identify the document. Once a code has been entered and the document has been submitted to final, it typically cannot be changed. |
|
|
Name | Enter a name to describe the document. The name does not have to be unique. |
| Status |
Select the status of the document. |
|
Import Configuration
In the Import area, select general information about the document type and format to use when importing data.
| Field | Description | |
|---|---|---|
|
|
Document to Import |
Select the document type to import. Available selections are limited to document types that you have security access to import. For additional information about the available documents, see Import Formats. |
|
|
Import Format |
Select the data format to use for the import. Available selections include the standard and custom (created using Import/Export Extensibility) formats defined for the selected Document to Import that you have selected and have security access to. The import format is a comma separated value (CSV) file, which defines the specific data columns and ordinal positions. |
| Has Headers | Select if the file has column headers. By default, this is selected. | |
|
|
Delimiter |
Select the type of delimiter used in the file to import. Available delimiters include: Comma, Semicolon, Pipe, and Tab. By default, Comma is selected. This value must match the delimiter used in the file being imported. |
|
|
Text Qualifier |
Select a text qualifier used in the file to import. Available text qualifiers include: None, Double Quote, and Single Quote. By default, Double Quote is selected. A text qualifier needs to be specified if there is punctuation in data values that can conflict with the delimiter and cause an invalid file format. If the text qualifier is specified, it must match the text qualifier that is used in the file being imported. |
| Locale |
Select the locale for the document. This interprets the number and date format in the CSV file that is being imported. By default, the locale used in the Smart Client is selected. |
|
Workflow
In the Workflow area, enter information about the workflow and actions to use when importing data.
| Field | Description | |
|---|---|---|
| Workflow | Select the workflow to use for the import. Available workflows include those you have security access to. Typically, the document should go through the same workflow it would have gone through if it was manually entered. When only one workflow is available, it is automatically selected. | |
| Workflow Action |
Select the workflow action to use to import the file. As if it were manually entered in BST11, the file will go through the normal workflow processing for the selected document type. The action will be commented as an Import Request and will be taken as the user submitting the request |
|
Email Notification
In the Email Notification area, select how often an email notification should be sent, what group should receive the email, and the email template used to create the email message. For additional information on email capabilities, see Manage Emails.
| Field | Description | |
|---|---|---|
| Frequency |
Select how often an email should be sent:
|
|
| Distribution Group |
Enter or select an active email distribution group. This is a predefined group of users that will receive email notifications. |
|
| Email Template |
Enter or select an active email template. A template defines the information, structure, and layout that will be included in emails. |
|
Routing File Locations
In the Routing File Locations area, define where import requests will be received. Files added to these locations will generate an import request using the import request routing selections.
| Field | Description | |
|---|---|---|
| Routing File Location |
Enter or select an active routing file location. This is the location where import requests will be received. Note: Each routing file location can only be associated with one, discrete Document to Import and Import Format combination; two different file formats cannot use the same, shared file location. |
|
| File Location | Displays the routing file location. | |
| Status | Displays the status of the location. | |