Import Request
The Import Request screen allows you to import data into BST11. Each import request represents a set of data, including one or more documents, that will be imported from an external CSV formatted file into the system. The request cannot be submitted until a CSV file with the data to import has been attached.
To be able to import data, you need standard security access in BST11; if you have access to see and edit a document type, you have access to import data for that document type.
General Tab
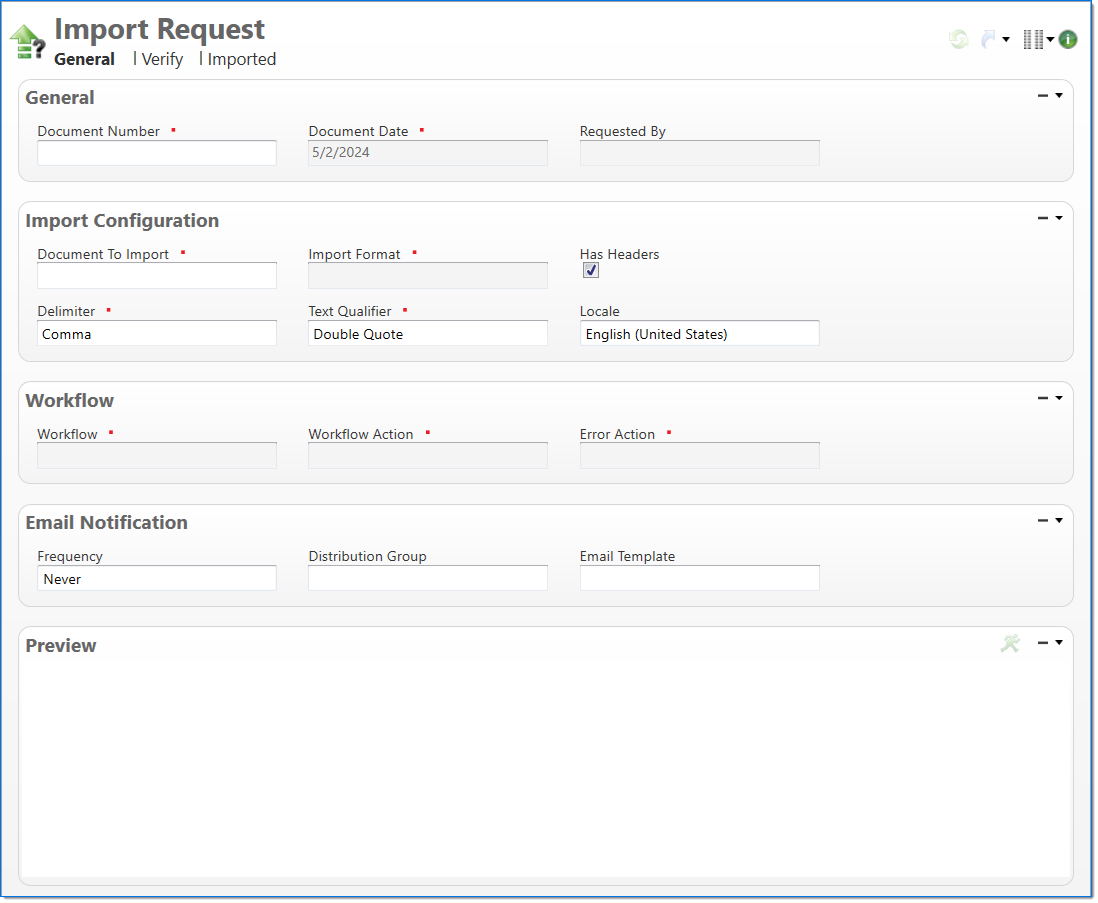
On the General tab, enter the options for the file that you will import.
General
In the General area, enter general information about the document.
| Field | Description | |
|---|---|---|

|
Document Number |
Enter a unique document number to identify this document.This field automatically prepopulates and be read-only if an auto-counter has been defined for this type of document. An auto-counter should be defined if you plan to automate imports using an Import Request Routing. |
|
|
Document Date | Displays the date that the request was created. This is entered by default and is read-only. |
| Requested By | Displays the user that created the request. This is entered by default and is read-only. | |
Import Configuration
In the Import area, select general information about the document type and format to use when importing data.
| Field | Description | |
|---|---|---|
|
|
Document to Import |
Select the document type to import. Available selections are limited to document types that you have security access to import. For additional information about the available documents, see Import Formats. |
|
|
Import Format |
Select the data format to use for the import. Available selections include the standard and custom (created using Import/Export Extensibility) formats defined for the selected Document to Import that you have selected and have security access to. The import format is a comma separated value (CSV) file, which defines the specific data columns and ordinal positions. |
| Has Headers | Select if the file has column headers. By default, this is selected. | |
|
|
Delimiter |
Select the type of delimiter used in the file to import. Available delimiters include: Comma, Semicolon, Pipe, and Tab. By default, Comma is selected. This value must match the delimiter used in the file being imported. |
|
|
Text Qualifier |
Select a text qualifier used in the file to import. Available text qualifiers include: None, Double Quote, and Single Quote. By default, Double Quote is selected. A text qualifier needs to be specified if there is punctuation in data values that can conflict with the delimiter and cause an invalid file format. If the text qualifier is specified, it must match the text qualifier that is used in the file being imported. |
| Locale |
Select the locale for the document. This interprets the number and date format in the CSV file that is being imported. By default, the locale used in the Smart Client is selected. |
|
Workflow
In the Workflow area, enter information about the workflow and actions to use when importing data.
| Field | Description | |
|---|---|---|
|
|
Workflow |
Select the workflow to use for the import. Available workflows include those you have security access to. Typically, the document should go through the same workflow it would have gone through if it was manually entered. When only one workflow is available, it is automatically selected. |
|
|
Workflow Action |
Select the workflow action to use to import the file. As if it were manually entered in BST11, the file will go through the normal workflow processing for the selected document type. The action will be commented as an Import Request and will be taken as the user submitting the request |
|
|
Error Action |
Select the workflow action to take when a document has an exception or fails validation. A selection cannot be made until a Workflow is selected, and then actions that are available in the IN state and do not required the document to pass validation can be selected. When the None action is selected, any documents that fail validation or have exceptions will be skipped and the errors will be logged in the results. |
Email Notification
In the Email Notification area, select how often an email notification should be sent, what group should receive the email, and the email template used to create the email message. For additional information on email capabilities, see Manage Emails.
| Field | Description | |
|---|---|---|
| Frequency |
Select how often an email should be sent:
|
|
| Distribution Group |
Enter or select an active email distribution group. This is a predefined group of users that will receive email notifications. |
|
| Email Template |
Enter or select an active email template. A template defines the information, structure, and layout that will be included in emails. |
|
Preview
As part of the import process, a single comma separated value (CSV) file, which defines the specific data columns and contains the data, must be attached to the document; for more information on how to attach a file, see Attachments. Only one file can be attached to an import request, and the request cannot be submitted, verified, and imported until the file is attached.
Once the file is attached, click the Run  button on the toolbar to display the top ten rows from the file in the Preview area. This allows you to verify that the data values (one column for each) in the import file are matched correctly with the selected document type format. Each row corresponds to a single row in the attached file. If the attached file does not match the expected format, an error will display in the Preview area.
Verify Tab
After the import request has been processed, the Verify tab displays a summary of the import and information about any validation or exception errors that occurred when the file was processed. When the Verify action is used, the Results tab allows you to review the import results before creating or updating the documents. When the Import action is used, the tab allows you to review a list of errors found in the imported documents.
Summary
The Summary area displays a summary of the documents that have been verified and imported.
|
Note: In a single import, documents can be both created and updated. |
| Field | Description |
|---|---|
| Total Documents |
Displays the total number of documents in the attached file that was imported. This number includes all of the Created and Updated documents. |
| Errors |
Displays the number of documents that had an exception or failed validation. Note: This is the number of documents that encountered errors and not the number of errors encountered overall. |
| Warnings |
Displays the number of documents that produced a warning. Note: This is the number of documents that encountered a warning and not the number of warnings encountered overall. |
| Created |
Displays the number of documents that were created as new documents with the main workflow action. |
| Updated | Displays the number of existing maintenance type documents that were updated by the import. Because they cannot be updated, the amount will be zero for input type documents. |
| Import Request Status |
Displays the status of the request.The following statues are available:
|
Results
The Results area displays a list of documents in the import. It includes details on which documents failed validation, have warnings, and are expected to be successfully imported. From this area, you can review the import results before the documents are created and updated when verifying an import. Once the import is complete, this area allows you review the list the errors that were found in the imported documents.
| Column | Description |
|---|---|
| Row Number | Displays the row number from the imported file. |
| Type | Displays if the document will be imported successfully. Available values are Error, Warning, and Success. |
| Business Key | Displays the business key of the document that will be created. When this is a compound key, the property contents should be combined so that all of the business key values are displayed. |
| Display Name | Displays the Display Name for the document to be created or updated. |
| Message | Displays the error message from the valuation or exception. This includes any import specific data process issues or constraints (e.g., truncation). |
| Location | Displays the Display Name or Caption for the source of the error (document, property, exception). |
| Error Code | Displays the error code from the failed validation or exception. |
Imported Tab
The Imported tab displays a list of documents that have been updated or created.
- Open Document: From the Imported Documents list, right-click on a document and then select Open Document.
| Column | Description |
|---|---|
| Document | Displays the Document Type for the document was created or updated. |
| Display Name | Displays the Display Name for the document that was created or updated. |
| Action | Displays the action taken for the document that was created or updated. |