Restrictions
The Restrictions area is used to enter criteria to restrict data on select documents, inquiries, charts, gauges, dashboards, and reports. This area is typically available above lists that have a search feature and on dashboards, inquiries, and reports.
By default, the Restrictions area is collapsed for documents and expanded for dashboards, inquiries, and reports. However, the last known state of the pane is used when you access a screen.
When multiple restrictions are defined, they are combined into a single search joined with an "and" operator. If multiple criteria are entered for a single restriction, they are combined with an "or" operator and the results can contain either of the values entered.
Display a Restrictions Area
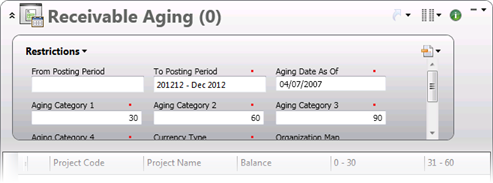
On some types of screens, the Restrictions area may be collapsed. The area is recognizable by the Advanced Search button displayed next to the screen name. If there are already restriction values entered, the restrictions button will display with a green bar to indicate restriction values
  .
.
- Click the Advanced Search button to toggle the area open and closed.
Apply Restrictions
- In the Restrictions area, enter criteria for each necessary restriction.
- If a down arrow (
 ) displays above the field, you can further control the restriction. Click the down arrow and then select how the entered value should be used to limit results. The available options are dependent on the type of field and available selection include: Begins with, Between, Contains, Ends with, Equals, Greater Than, and Less Than. When Between is selected, the field allows you to enter a range of values.
 - Depending on the type of document, click the Search
 button (to update a list) or click the Run
 button (to update an inquiry, visualizer, or dashboard or to run a report).
The updated list or screen will now include results that match any entered restrictions. Reports are available from the navigation pane.
Optional Restrictions
Some screens will have optional restrictions that can be added as needed basis but are never required.
- Add an Optional Restriction: Click the drop down arrow next to the Restrictions title and then select the restriction to add. The selected restriction is added to the end of the list.
- Delete an Optional Restriction: Click the drop down arrow next to the Restrictions title and then select the restriction to remove. The selected optional restriction is removed from the list.
Tokens
On some restriction fields, the look-up dialog box provides a drop-down list of tokens. Tokens are shortcuts for generically defined labels that allow you to select a certain data, a date, or a time period for a restriction.
For example, date tokens include shortcut references to days, weeks, months, years, posting dates, fiscal periods, and fiscal years. Date Tokens are based on a Today token, which is typically the current date. For example, if you select the This Period token, the Today token is used to select the corresponding period. Similarly, when you select the Last Period token, the Today token is used to select the last period before the current period.
Inquiry Checkboxes - Both Option
For inquiries, any checkbox field provides three options, which include selected, deselected, and both. The both option returns items that match both states. To select the both option, click on the checkbox until it is filled with a blue box.
Restriction Sets
Once you have defined restrictions, you can save and share them as a restriction set. Both existing and user defined restrictions are saved, as well as any values entered in the restrictions fields. For more information on managing shared and unshared restriction sets, see Inquiry Preferences
Manage Restriction Sets
Click the Restrictions  button, which is located to the right of the list, to access the drop-down list with options:
- Save As: This option displays the Save Restrictions As dialog box, which allows you to save the active set of restrictions as a new named restriction set. It will also allow you to overwrite an existing shared or unshared restriction set.
- Rename: This option displays the Rename dialog box, which allows you to enter a new name for the active shared or unshared restriction set.
- Remove: This option displays the Remove Restrictions dialog box, which allows you to delete a shared or unshared restriction set.
- Share: This option displays the Shared Restrictions dialog box, which allows users with permission to share the active shared or unshared restriction set.
Apply a Restriction Set
- Once a restriction set is saved, click the Restrictions button and then select the saved restriction set from the drop-down list. When a previously saved restriction is loaded, it clears any entered restriction criteria.